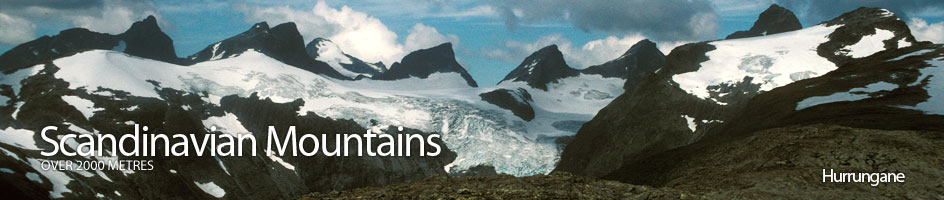
Scandinavian Mountains over 2000 metres - James Baxter
Areas › Hurrungane › Austanbotntind › Alternative Routes
There are two usual routes up Store Austanbotntind: both start from the Turtagrø to Årdal road and then respectively, go up the west arête via the west peak or up the south arête via the south peak. The west ridge is the normal route up and the climbing is not so demanding at grade II, but it is exposed. This west ridge is the route which I have described in the main section.
 The south ridge is more demanding and exposed and the climbing is grade III, with long sections of grade II, and this is described here. There is a classic traverse of the whole massive taking in the south and west ridge. This traverse is probably best done by ascending the south ridge and descending the west ridge. Ideally the traverse is best done in August when it should take 11-13 hours.
The South Ridge Route
From the parking opportunity some hundred metres north of the toll booth head up to knoll 1492m as described below. From this knoll continue east descending into an easy corrie and crossing pleasant terrain to the rounded ridge of moraine on the east side. Climb up this moraine ridge until you get onto the ridge itself at the bottom of a steep shoulder. It is best to keep well to the south of this shoulder where the gradient is not as steep, until you gain the small plateau on top of it.
From this plateau continue up the relentless boulders of the broad south ridge for another 300 metres until the ridge narrows considerably as you approach a peak. Just before this peak, the route initially goes to the east of a boulder, across a narrow exposed shelf under the boulder itself. After this boulder the route then cuts back to the west side of the ridge and follows a small and equally exposed shelf past a 2m step to gain the top. This short section is grade II and due to the exposure should be protected. From the top of this the gendarme and the large crag beyond it present a daunting sight.
 From the top of this first peak there is a short, but narrow and exposed, arête down to the saddle with the gendarme. The gendarme itself is some 10m high and is it easiest to go over it, rather than round it. The climb up is quite an easy grade III scramble, but towards the top the holds are poor and one must rely on friction, which will make things more difficult in the wet.
At the top of the gendarme there is a short 7m abseil down the north side. If coming the other way this short north side is a grade V climb. From the bottom of the north side of the gendarme the direct route now goes up an easy but exposed 30m slab to the bottom of a very daunting crag and then climbs this crag for a 30m grade V pitch. The normal way up avoids this difficult crag by ascending the apex of the arête for a few metres and then traversing some 40m out to the east across the exposed slab, which drops steeply down to Gravdalen long in an uninterrupted sweep.
This traverse leads you under the buttress to its east ridge, beyond which is another smaller slab. This second slab, however, is often wet due to a melting snowfield. If it is wet it is probably best not to cross it but to climb the grade III pitch up the east edge of the buttress. If it is dry however, it is preferable to cross this second slab and then follow the loose spur up for a grade II pitch. At the top of either of these pitches the route now follows the arête north for a problem free 100m to the top of Søre Austanbotntind.
 From the top of Søre Austanbotntind the route continues north over a sensational arête, descending some 30m to the saddle with Store Austanbotntind. The descent to this saddle offers some exciting scrambling at grade II, and although exposed it is not technical. From the saddle, however, the direct route up the arête is much more demanding and involves 4 pitches, with three of them at grade V.
This direct route is avoided by taking the normal route which is grade III. This normal route starts at the saddle and descends slightly to a small sloping shelf on the east of the arête. This broken exposed shelf continues for a short rope length across the east side of the mountain until it approaches a spur. The traverse across this broken shelf is a good grade III and route finding can be a problem as the shelves are difficult to link up. As the spur is approached the route now starts to climb up stacked blocks in a shallow gully. At the top of this gully make the short traverse to the apex of the spur.
Once on the spur continue to traverse onto its south side then ascend up the loose terrain, which soon becomes more stable, for a long grade II pitch to reach the top of the lowest and most western of the 3 humps on the summit ridge. From this westernmost top, it is a short steep descent to saddle where the normal ascent route via the west ridge is met, at the top of the large slabs on the north side. The route to the summit follows the summit ridge east as described below. The total time to the summit is about 7-10 hours.